
Did you know that most home cooks overbake chicken breast by just a few minutes, yet that small mistake can turn a juicy, healthy dinner into something dry and forgettable? That is exactly why Easy Baked Chicken Breast for Beginners is one of the most useful recipes to master if you want a simple, high-protein meal that actually tastes good.
If you are new to cooking chicken, this recipe removes the guesswork. With a few pantry spices, the right oven temperature, and one easy baking method, you can make tender, flavorful chicken breast that works for weeknight dinners, healthy meal prep, salads, wraps, bowls, and low-carb meals. Whether your goal is to eat cleaner, save time, or build confidence in the kitchen, this beginner-friendly baked chicken breast recipe gives you a reliable starting point that is healthy, delicious, and practical for everyday life.
This guide is designed to help you get it right the first time. You will learn exactly what ingredients to use, how long to bake chicken breast, how to avoid common mistakes, and how to keep your chicken juicy instead of dry. By the end, you will have a go-to healthy chicken recipe you can use again and again.
Ingredients List
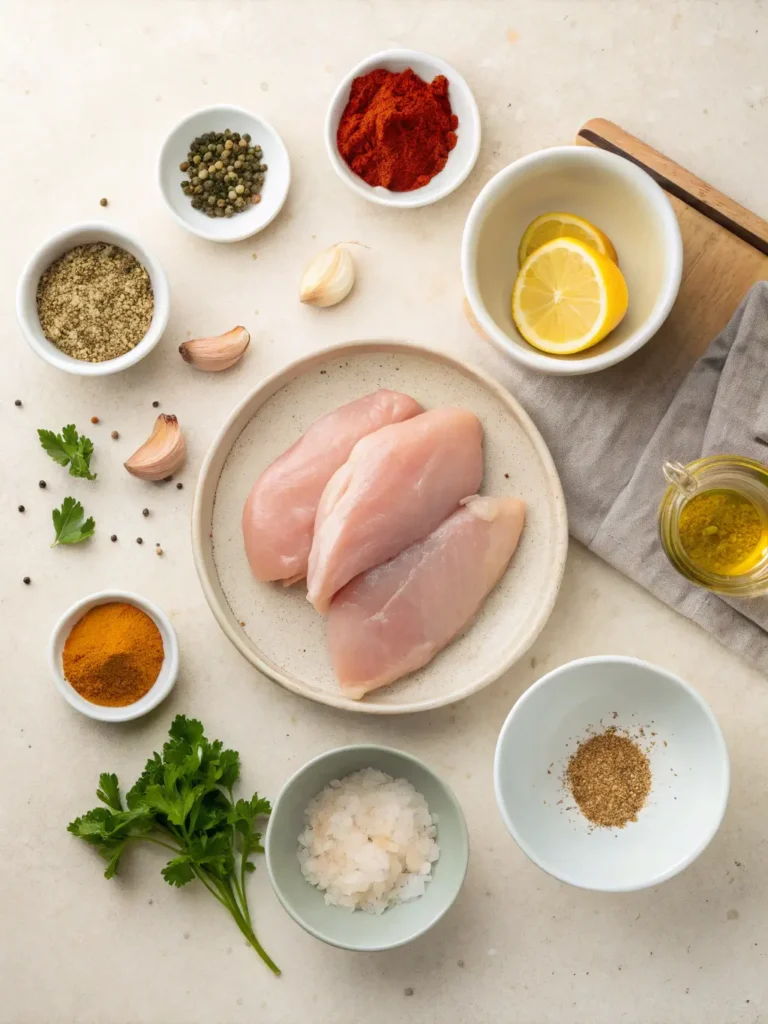
One reason this recipe works so well for beginners is that it uses simple ingredients you probably already have at home. Each ingredient adds flavor, moisture, or texture, so even basic chicken breast becomes something satisfying and versatile.
Main Ingredients
- 2 boneless, skinless chicken breasts
- 1 tablespoon olive oil
- 1 teaspoon garlic powder
- 1 teaspoon onion powder
- 1 teaspoon paprika
- 1/2 teaspoon dried oregano
- 3/4 teaspoon salt
- 1/2 teaspoon black pepper
- 1 teaspoon lemon juice, optional
- Fresh parsley for garnish, optional
Optional Flavor Add-Ins
- 1/4 teaspoon chili flakes for a little heat
- 1/2 teaspoon smoked paprika for a deeper flavor
- 1 teaspoon Dijon mustard for extra tang
- 1 tablespoon grated parmesan for a savory finish
Ingredient Substitutions
If you want to adapt this recipe to your taste or what you have available, here are easy swaps:
- Olive oil → avocado oil
- Paprika → smoked paprika or sweet chili seasoning
- Oregano → Italian seasoning or thyme
- Chicken breast → chicken tenderloins for faster cooking
- Lemon juice → apple cider vinegar for brightness
Why These Ingredients Work
This combination creates a balanced baked chicken breast with:
- Moisture from olive oil
- Savory depth from garlic and onion powder
- Color and warmth from paprika
- Herbal freshness from oregano
- Natural brightness from lemon juice
If you want to keep it even simpler, you can use only olive oil, salt, pepper, garlic powder, and paprika and still get excellent results.
Timing
This recipe is ideal if you want something healthy without spending too much time in the kitchen.
Time Breakdown
- Prep Time: 10 minutes
- Cook Time: 18 to 22 minutes
- Rest Time: 5 minutes
- Total Time: 33 to 37 minutes
That means this recipe is faster than many breaded or pan-fried chicken dinners and requires less cleanup too. For beginners, baked chicken breast is one of the easiest ways to get consistent results with minimal effort.
Helpful Timing Tip
Chicken breasts cook faster and more evenly when they are similar in thickness. If one side is much thicker than the other, it may dry out before the center finishes cooking. Spending 1 minute flattening the thicker side can improve the final result more than most people realize.
Step-by-Step Instructions
Step 1: Preheat Your Oven
Set your oven to 425°F (220°C).
This is one of the most important parts of the recipe. A hotter oven helps the chicken cook quickly and stay juicy. Lower temperatures can work, but they often increase the risk of dry chicken because the meat spends more time in the heat.
Beginner Tip: Always let the oven fully preheat before baking. Putting chicken into a half-heated oven often leads to uneven cooking.
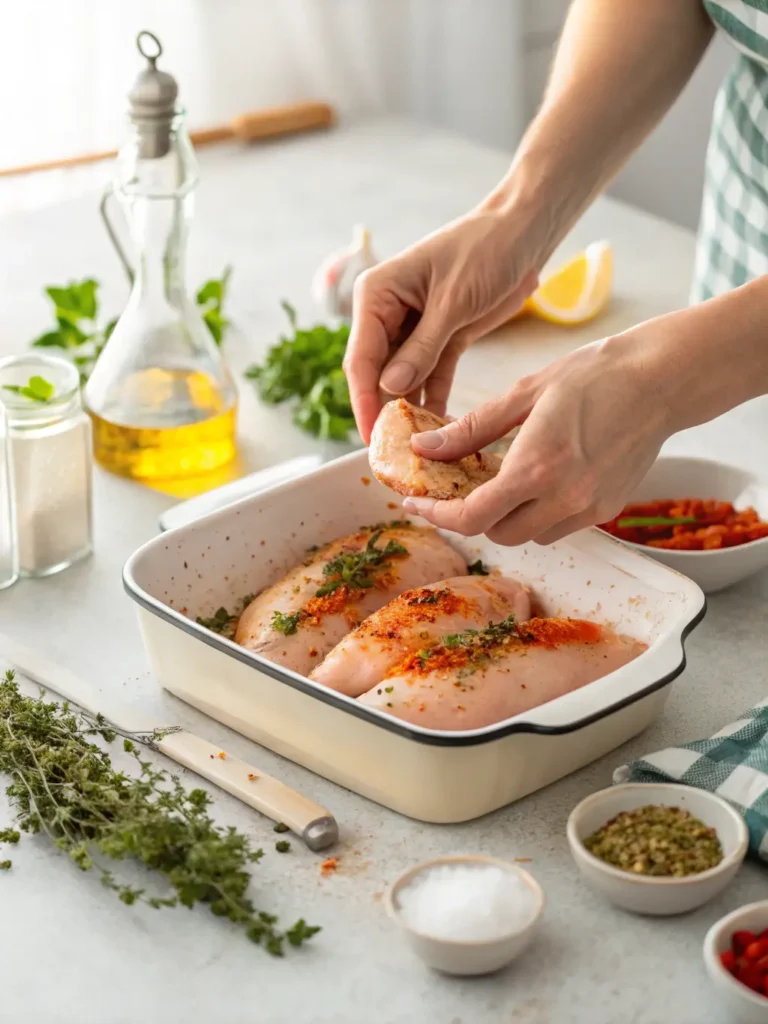
Step 2: Prepare the Chicken
Take the chicken breasts out of the package and pat them dry with paper towels.
Drying the surface helps the seasoning stick better and improves the texture on the outside. If the chicken breasts are very thick on one side, gently pound them to a more even thickness using:
- a rolling pin
- a meat mallet
- or the bottom of a heavy mug
This small step can make a big difference. Even chicken thickness means even baking, and even baking means juicier chicken.
Step 3: Make the Seasoning Blend
In a small bowl, mix together:
- garlic powder
- onion powder
- paprika
- oregano
- salt
- black pepper
- chili flakes if using
Drizzle the chicken with olive oil, then rub the seasoning mixture evenly over both sides.
If you like a brighter flavor, add a little lemon juice right before placing the chicken in the oven.
Flavor Tip: For beginners, dry seasoning blends are easier and more reliable than wet marinades when baking.
Step 4: Arrange in a Baking Dish
Place the chicken breasts in a lightly greased baking dish or on a parchment-lined baking tray.
Make sure there is a little space between each piece. If they are packed too closely together, they may steam instead of roast.
If you want a little extra moisture and aroma, you can place lemon slices around the chicken before baking.
Step 5: Bake the Chicken
Bake the chicken for 18 to 22 minutes, depending on thickness.
The most accurate way to know when chicken is done is to use a meat thermometer. The internal temperature should reach 165°F (74°C) in the thickest part.
If you do not have a thermometer, cut into the thickest part:
- the juices should run mostly clear
- the center should no longer be pink
Still, if you cook chicken often, a thermometer is one of the best small kitchen tools you can own.
Step 6: Let It Rest
Once the chicken is fully cooked, remove it from the oven and let it rest for 5 minutes before slicing.
This is the step many beginners skip, but it matters a lot. Resting allows the juices to redistribute throughout the meat, which helps keep every bite tender and moist.
If you cut it immediately, many of those juices will run out onto the plate instead of staying inside the chicken.
Step 7: Slice and Serve
Slice the chicken against the grain for the best texture. You can serve it whole, slice it for salads and bowls, or dice it for wraps and meal prep containers.
At this point, you have a simple, healthy baked chicken breast that can be used in dozens of ways.
Nutritional Information
This recipe is naturally high in protein and relatively low in calories, making it a strong option for healthy eating, weight management, and meal prep.
Approximate Nutrition Per Serving
(Based on 1 chicken breast with seasoning and oil)
| Nutrient | Amount |
|---|---|
| Calories | 220 to 260 kcal |
| Protein | 32 to 38g |
| Fat | 8 to 10g |
| Carbohydrates | 1 to 3g |
| Fiber | 0g |
| Sodium | Varies by salt used |
Why It Is a Healthy Choice
Chicken breast is often recommended in healthy eating plans because it is:
- high in lean protein
- low in carbohydrates
- easy to portion
- adaptable for many diets
Protein also plays a key role in fullness, muscle maintenance, and meal satisfaction. That means this recipe is not just easy, it is also practical for anyone trying to build healthier eating habits.
Healthier Alternatives for the Recipe
One of the best things about this recipe is how flexible it is. You can make small adjustments depending on your goals, preferences, or dietary needs without losing flavor.
For Lower Calories
- Use cooking spray instead of olive oil
- Reduce added salt and serve with fresh herbs and lemon
- Pair with steamed vegetables instead of heavier sides
For More Protein
- Serve with Greek yogurt dip
- Add cottage cheese on the side
- Slice extra chicken for lunch bowls or salads
For Lower Sodium
- Use less salt and more herbs
- Try garlic, paprika, black pepper, thyme, and lemon zest for flavor
- Use salt-free seasoning blends
For Low Carb or Keto
This recipe is already low in carbs, but you can make it even more keto-friendly by serving it with:
- cauliflower rice
- zucchini noodles
- roasted broccoli
- avocado salad
For Meal Prep
This is one of the best healthy chicken breast recipes for meal prep because it stores well and works in many different meals.
Serving Suggestions
A great baked chicken breast recipe becomes even better when paired with the right sides. Whether you want a simple dinner, a healthy lunch, or a family meal, this chicken is easy to customize.
Best Healthy Side Dishes
- Roasted broccoli
- Garlic green beans
- Sweet potato wedges
- Brown rice
- Quinoa
- Cauliflower rice
- Garden salad
- Cucumber tomato salad
Easy Meal Ideas Using This Chicken
You can also turn this chicken into other quick meals:
- Slice it into a chicken salad
- Add it to a grain bowl
- Wrap it in a whole wheat tortilla
- Dice it into a healthy pasta dish
- Use it in a meal prep lunch box
Personalized Serving Tip
If you are cooking for beginners or picky eaters, keep the seasoning mild and let everyone add sauces or sides they enjoy. This makes the meal feel flexible without creating extra work.
Common Mistakes to Avoid
Even simple recipes can go wrong if you miss a few key details. Here are the most common beginner mistakes and how to avoid them.
1. Overcooking the Chicken
This is the biggest reason chicken breast turns dry.
How to avoid it:
Use a meat thermometer and remove the chicken as soon as it reaches 165°F (74°C).
2. Baking at the Wrong Temperature
A low oven often means longer cooking and drier meat.
How to avoid it:
Bake at 425°F (220°C) for a faster, juicier result.
3. Skipping the Rest Time
Cutting into the chicken immediately causes the juices to escape.
How to avoid it:
Let it rest for 5 minutes before slicing.
4. Not Seasoning Enough
Chicken breast is naturally mild, so under-seasoning leads to bland results.
How to avoid it:
Use enough salt, garlic powder, paprika, and herbs to build flavor.
5. Using Uneven Chicken Breasts
If one side is much thicker than the other, one part may dry out before the center is cooked.
How to avoid it:
Pound the thicker side lightly before baking.
Storing Tips for the Recipe
This recipe is excellent for leftovers, which is one reason it works so well for meal prep and busy households.
Refrigerator Storage
Store cooked chicken breast in an airtight container in the refrigerator for:
3 to 4 days
Freezer Storage
You can freeze baked chicken breast for:
up to 3 months
For best results:
- let it cool completely first
- wrap portions well
- label the container with the date
Best Reheating Tips
To keep the chicken from drying out:
- reheat gently in the microwave with a splash of water
- warm it in the oven covered with foil
- slice only what you need before reheating
Meal Prep Tip
Store your chicken separately from sauces and watery vegetables. This helps maintain texture and flavor throughout the week.
Conclusion
Easy Baked Chicken Breast for Beginners is the kind of recipe every home cook should know. It is quick, healthy, high in protein, and simple enough for anyone to make with confidence. Try it today, leave a review or comment on the blog, and subscribe for more easy healthy recipes and beginner-friendly cooking tips.
FAQs
1. How long should I bake chicken breast in the oven?
Most chicken breasts bake in 18 to 22 minutes at 425°F (220°C), depending on thickness.
2. How do I keep baked chicken breast from drying out?
Use the right oven temperature, avoid overcooking, and let the chicken rest before slicing.
3. Is baked chicken breast healthy?
Yes, baked chicken breast is a healthy, lean protein option that fits well into balanced meals, meal prep, and low-carb eating plans.
4. Can beginners really make juicy baked chicken breast?
Absolutely. If you follow the right method and timing, this is one of the easiest and most beginner-friendly chicken recipes you can make.
5. What should I serve with baked chicken breast?
Great options include roasted vegetables, salad, brown rice, quinoa, sweet potatoes, or cauliflower rice.
6. Can I use frozen chicken breast?
It is best to thaw chicken completely before baking for even cooking and better texture.
7. Can I meal prep this recipe?
Yes, this recipe is excellent for meal prep and can be used in salads, wraps, bowls, and healthy dinner plates throughout the week.
Have You Tried Our Recipe?
There are no reviews yet. Be the first one to write one.