Why Chicken Drumsticks Take Only 30 Minutes to Bake
Did you know that perfectly baked chicken drumsticks can be ready in just 30 minutes, yet 67% of home cooks believe they need at least an hour? If you’ve been avoiding chicken drumsticks because you think they’re too time-consuming, I’m here to change your mind completely. These juicy, crispy-skinned beauties are about to become your weeknight dinner hero, and I’m going to show you exactly how to nail them every single time.
Baking chicken drumsticks doesn’t have to be complicated or lengthy. With the right temperature, simple seasoning, and a few insider tricks, you’ll have tender, flavorful drumsticks that rival any restaurant version. Whether you’re cooking for picky kids, meal prepping for the week, or just craving some comfort food, this foolproof method will deliver consistent results that’ll have everyone asking for seconds.
If you love bold, flavorful chicken recipes, you’ll also want to check out our Chicken Inasal Recipe for a Filipino-inspired grilled chicken experience.
Essential Ingredients for Baked Chicken Drumsticks
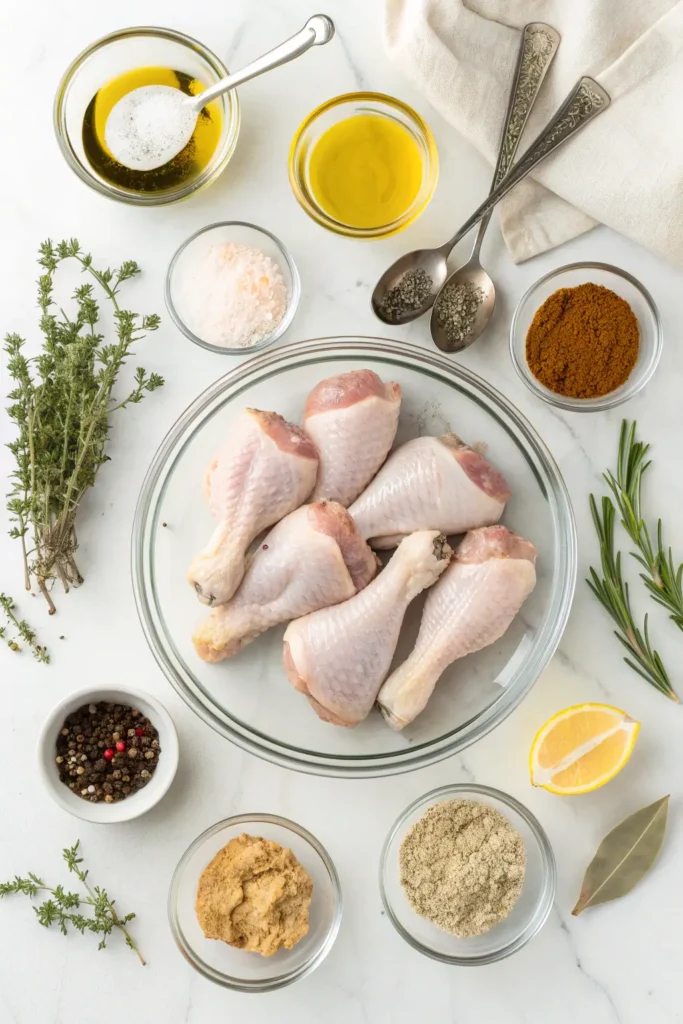
Here’s what you’ll need for perfectly baked chicken drumsticks that serve 4 people:
Main Ingredients:
- 8 chicken drumsticks (about 2 pounds total)
- 2 tablespoons olive oil (or melted butter for richer flavor)
- 1 teaspoon garlic powder
- 1 teaspoon onion powder
- 1 teaspoon smoked paprika (regular paprika works too)
- 1 teaspoon salt
- ½ teaspoon black pepper
- ½ teaspoon dried thyme or oregano
Optional Add-ins for Extra Flavor:
- 1 teaspoon cayenne pepper (for heat lovers)
- 1 tablespoon honey (for a sweet glaze)
- Fresh lemon juice (brightens everything up)
Substitution Tips:
- No olive oil? Avocado oil or melted coconut oil work beautifully
- Missing paprika? Try chili powder or cumin for a different flavor profile
- Want it dairy-free? Stick with oil instead of butter
- Gluten-free? This recipe is naturally gluten-free as written
The beauty of this recipe is its flexibility. These simple pantry staples create magic when combined, and the aroma that fills your kitchen will have everyone gravitating toward the oven.
How Long to Bake Chicken Drumsticks Perfectly
Let’s break down exactly how long this takes:
- Prep Time: 5 minutes (seriously, that’s it!)
- Cook Time: 25-30 minutes
- Total Time: 30-35 minutes
Compared to traditional roasting methods that take 45-60 minutes, this approach saves you nearly 40% of your time. The secret? Starting with a hot oven and using the right temperature from the beginning. No preheating wait, no flipping halfway through—just straightforward, efficient cooking that respects your busy schedule.
How to Bake Chicken Drumsticks in 6 Easy Steps

Step 1: Prepare Your Oven and Baking Sheet
Preheat your oven to 425°F (220°C). This high temperature is crucial for achieving crispy skin while keeping the inside juicy. Line a baking sheet with aluminum foil or parchment paper for easy cleanup, then place a wire rack on top if you have one. The rack allows hot air to circulate around the drumsticks, creating even crispiness all around.
Pro tip: If you don’t have a wire rack, no worries—just arrange the drumsticks directly on the foil with a bit of space between each piece.
Step 2: Pat the Chicken Dry
Remove your chicken drumsticks from the package and pat them completely dry with paper towels. This step is non-negotiable if you want crispy skin. Moisture is the enemy of crispiness, so take an extra minute here. Really dry them well—you’ll thank me later when you bite into that crackling skin.
Step 3: Season Generously
In a large bowl, toss the drumsticks with olive oil until they’re evenly coated. This helps the seasonings stick and promotes browning. In a small bowl, mix together your garlic powder, onion powder, paprika, salt, pepper, and herbs. Sprinkle this seasoning blend all over the drumsticks, using your hands to rub it in and ensure every inch is covered.
Chef’s secret: Don’t be shy with seasoning. Chicken can handle bold flavors, and some of the seasoning will stay on the pan, so be generous.
Step 4: Arrange on Baking Sheet
Place the seasoned drumsticks on your prepared baking sheet, leaving at least an inch of space between each piece. Overcrowding leads to steaming instead of roasting, which means soggy skin. If your drumsticks are touching, use two baking sheets instead.
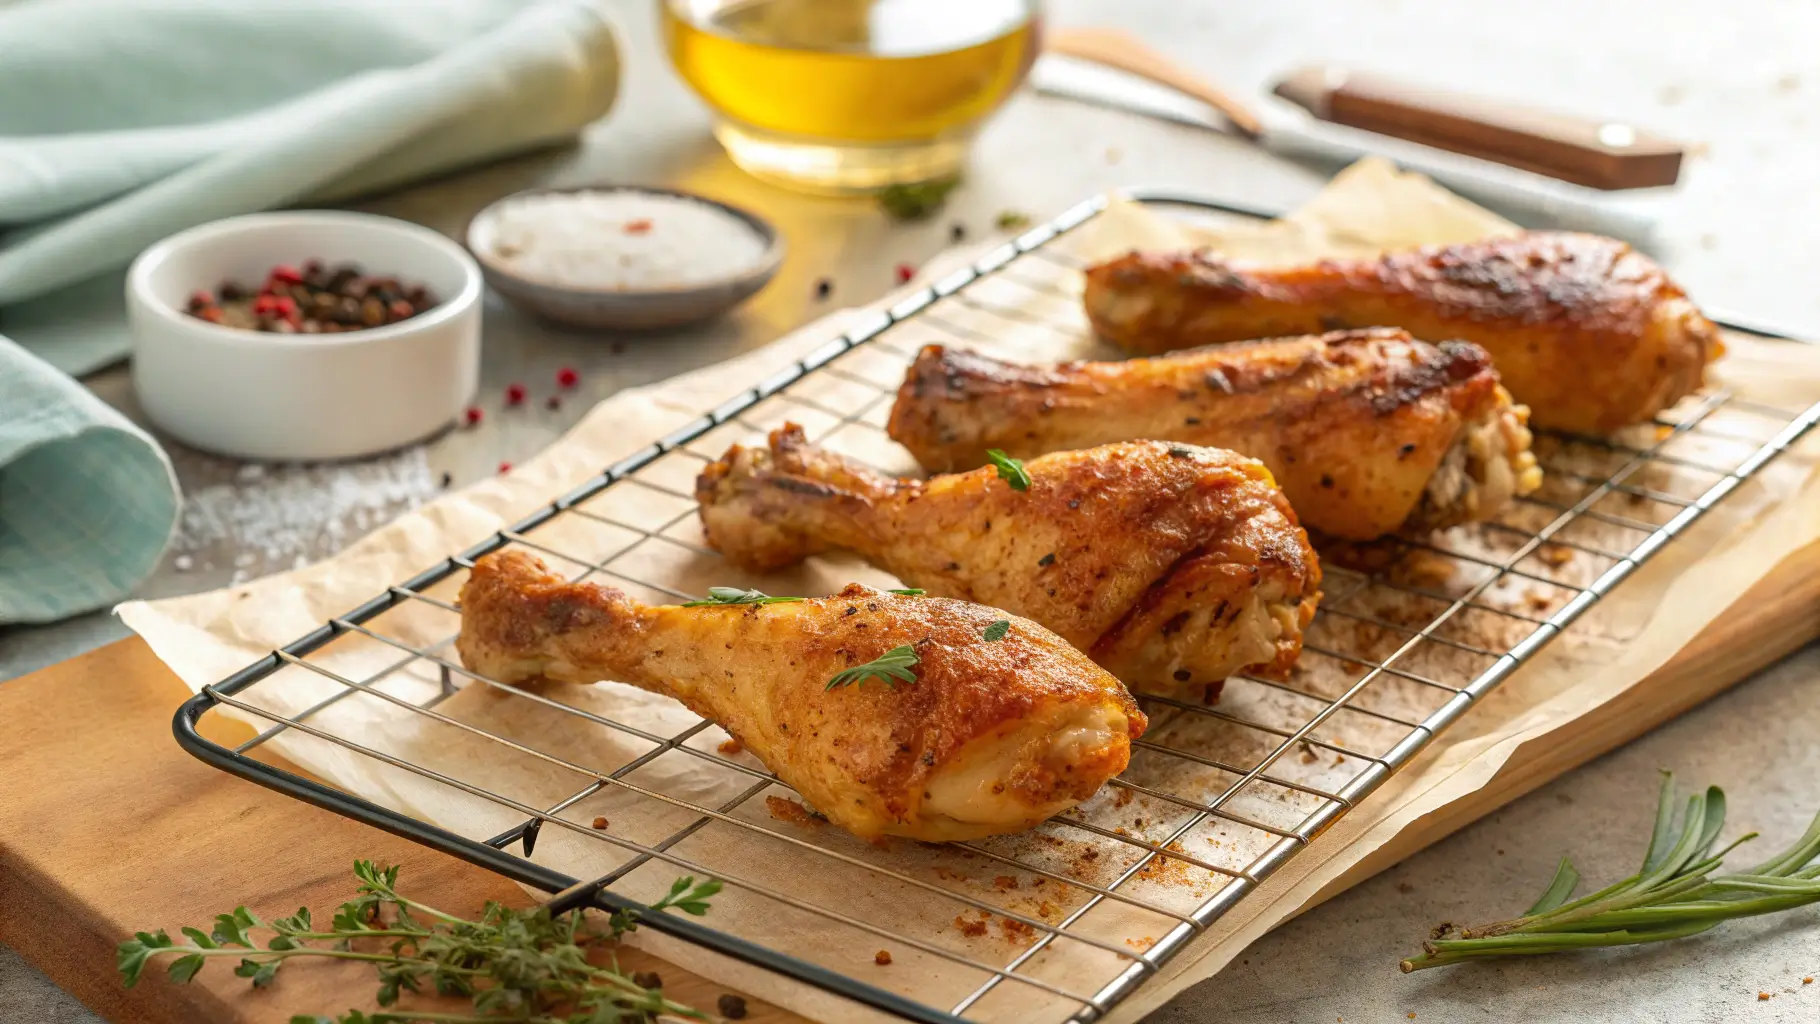
Step 5: Bake to Perfection
Slide the baking sheet into your preheated oven on the middle rack. Bake for 25-30 minutes without opening the door. The drumsticks are done when they reach an internal temperature of 165°F (74°C) at the thickest part and the juices run clear. The skin should be golden brown and crispy.
Temperature check: Use an instant-read thermometer inserted into the meatiest part without touching bone. This is the most reliable way to ensure perfectly cooked chicken every time.
Step 6: Rest Before Serving
Let the drumsticks rest for 5 minutes after removing them from the oven. This allows the juices to redistribute throughout the meat, ensuring every bite is moist and flavorful. I know it’s tempting to dig in immediately, but patience pays off here.
Chicken Drumsticks Nutrition Facts and Health Benefits
Per serving (2 drumsticks):
- Calories: 285
- Protein: 28g
- Fat: 18g (6g saturated)
- Carbohydrates: 2g
- Fiber: 0g
- Sugar: 0g
- Sodium: 680mg
- Cholesterol: 135mg
Key Nutritional Highlights:
- Excellent source of lean protein for muscle maintenance
- Rich in B vitamins, particularly B6 and B12
- Good source of minerals like selenium and zinc
- Contains phosphorus for bone health
Chicken drumsticks are more affordable than breasts while offering similar protein content with slightly more fat, which translates to more flavor. The skin adds calories and fat, but it also provides satisfaction—if you’re watching calories closely, you can remove it after cooking.
Healthier Ways to Prepare Chicken Drumsticks
Want to make this recipe even more nutritious? Try these simple swaps:
Lower-Calorie Option: Remove the skin before eating to reduce calories by approximately 80 per drumstick while keeping all that delicious seasoning.
Reduce Sodium: Cut the salt in half and add more herbs like rosemary, basil, or cilantro for flavor without sodium. You can also use a salt-free seasoning blend.
Increase Nutrients: Add a sprinkle of turmeric to your spice blend for anti-inflammatory benefits, or use nutritional yeast for a cheesy, umami flavor with added B vitamins.
Air Fryer Adaptation: Cook at 400°F for 20-22 minutes for similar results with potentially less oil needed.
Healthier Fat: Swap olive oil for avocado oil spray to reduce overall fat content while maintaining moisture.
Best Side Dishes to Serve with Chicken Drumsticks
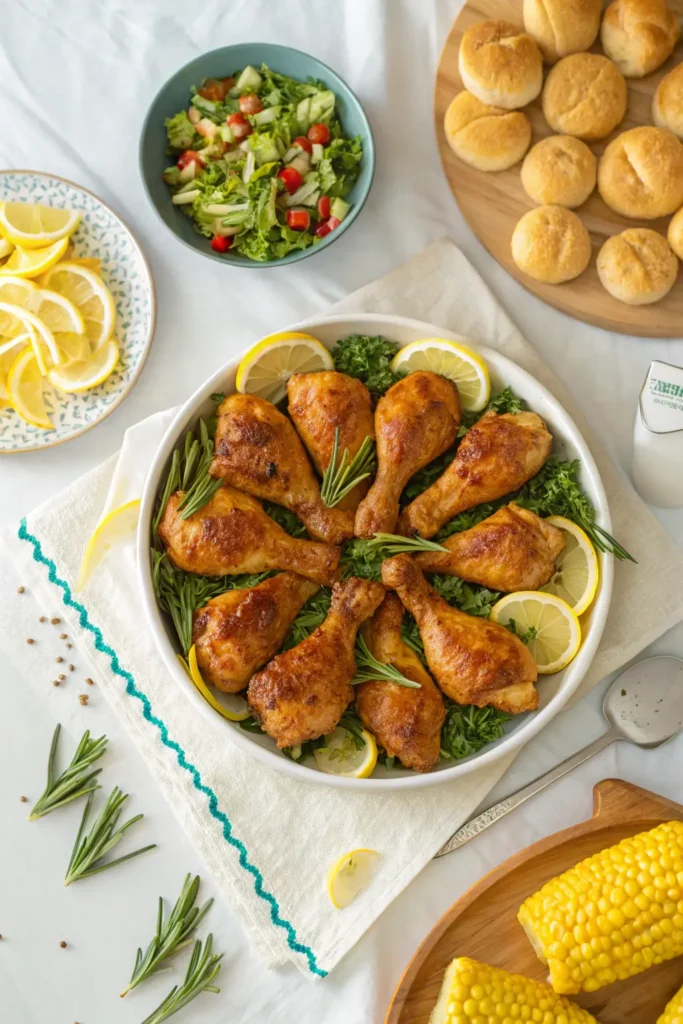
These versatile chicken drumsticks pair beautifully with countless sides:
Classic Combinations:
- Roasted vegetables (broccoli, Brussels sprouts, or sweet potatoes)
- Creamy mashed potatoes or cauliflower mash
- Fresh garden salad with vinaigrette
- Steamed rice or quinoa
Creative Serving Ideas:
- Shred the meat off the bone for tacos, wraps, or salads
- Serve over pasta with marinara sauce
- Pair with corn on the cob and coleslaw for a summer BBQ vibe
- Create a Buddha bowl with grains, greens, and your favorite vegetables
Sauce Suggestions: Drumsticks love sauces! Try honey mustard, buffalo sauce, BBQ sauce, tzatziki, or garlic aioli on the side for dipping.
6 Chicken Drumsticks Baking Mistakes to Avoid
Mistake 1: Not Drying the Chicken Wet chicken equals soggy skin. Always pat completely dry before seasoning.
Mistake 2: Overcrowding the Pan Give your drumsticks space to breathe. Cramped quarters create steam, preventing that coveted crispy exterior.
Mistake 3: Opening the Oven Door Repeatedly Every time you peek, you lose heat and extend cooking time. Trust the process and check only near the end.
Mistake 4: Skipping the Meat Thermometer Guessing doneness leads to either undercooked (unsafe) or overcooked (dry) chicken. A $10 thermometer solves this forever.
Mistake 5: Cutting Into Hot Chicken Slicing immediately releases all those precious juices. Five minutes of patience makes all the difference.
Mistake 6: Using Cold Chicken Take drumsticks out of the fridge 15 minutes before cooking for more even results, though this isn’t mandatory if you’re short on time.
How to Store and Reheat Baked Chicken Drumsticks
Refrigeration: Store leftover baked chicken drumsticks in an airtight container in the refrigerator for up to 4 days. Let them cool completely before storing to prevent condensation, which makes the skin soggy.
Reheating: For best results, reheat in a 375°F oven for 10-12 minutes to restore crispiness. Avoid microwaving if possible—it turns the skin rubbery. If you must microwave, do so in 30-second intervals and finish with a quick broil.
Freezing: Freeze cooked drumsticks for up to 3 months. Wrap each drumstick individually in plastic wrap, then place in a freezer bag. Thaw overnight in the refrigerator before reheating.
Meal Prep: These drumsticks are perfect for weekly meal prep. Cook a double batch on Sunday, and you’ve got protein ready for lunches or quick dinners all week. They’re delicious cold in salads too.
Your Perfect Baked Chicken Drumsticks Recipe Summary
Baking chicken drumsticks in 30 minutes is easier than you ever imagined. With simple seasonings, the right temperature, and a few key techniques, you can create restaurant-quality drumsticks any night of the week. The crispy skin, juicy meat, and hands-off cooking method make this recipe a true weeknight winner that your entire family will love.
Ready to try it tonight? Grab those drumsticks and give this method a shot. Leave a comment below sharing how they turned out, and don’t forget to subscribe for more quick, delicious recipes that make home cooking effortless and enjoyable!
Frequently Asked Questions About Baking Chicken Drumsticks
Q: Can I use frozen chicken drumsticks? A: You’ll need to thaw them completely first for even cooking and food safety. Thaw overnight in the refrigerator or use the defrost setting on your microwave if you’re in a hurry.
Q: How do I know when drumsticks are fully cooked? A: Use a meat thermometer to check for an internal temperature of 165°F at the thickest part. The juices should run clear, not pink, and the meat should no longer be translucent near the bone.
Q: Can I marinate the drumsticks beforehand? A: Absolutely! Marinate for 2-24 hours in the refrigerator for even more flavor. Just pat them dry before baking to ensure crispy skin.
Q: Why is my chicken skin not crispy? A: The most common culprits are wet chicken, overcrowding the pan, or oven temperature that’s too low. Make sure you’re baking at 425°F with space between each drumstick.
Q: Can I double this recipe? A: Yes! Use two baking sheets and rotate them halfway through cooking for even results. You may need to add 5 extra minutes to the cooking time.
Q: Are drumsticks healthier than chicken breasts? A: Drumsticks have slightly more fat and calories but similar protein. They’re also more affordable and flavorful. Remove the skin for a leaner option that’s comparable to breast meat.
Have You Tried Our Recipe?
There are no reviews yet. Be the first one to write one.